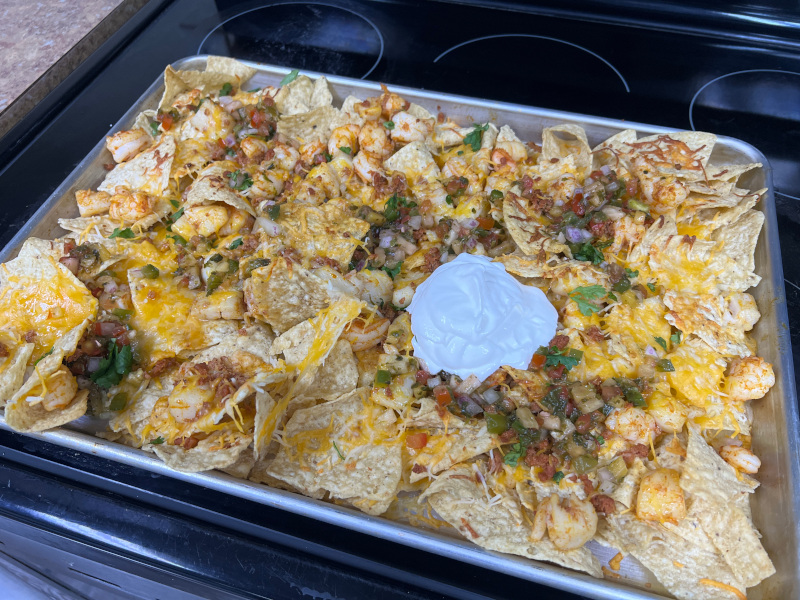
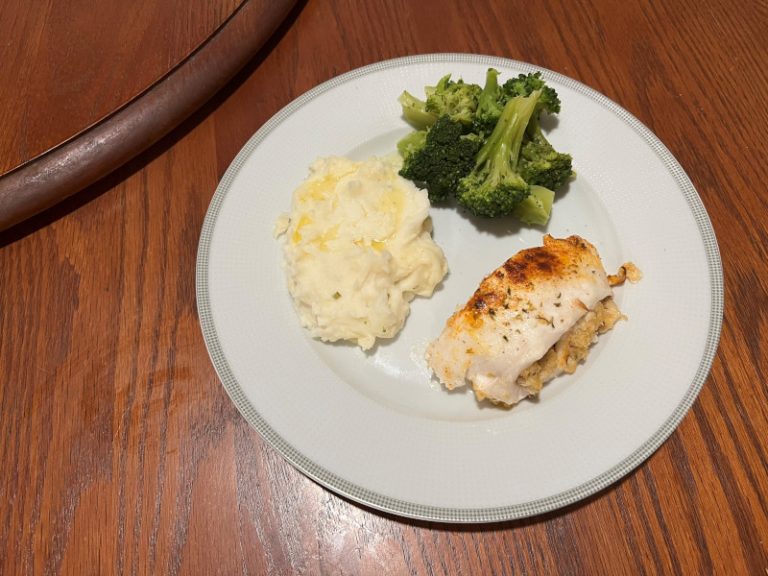
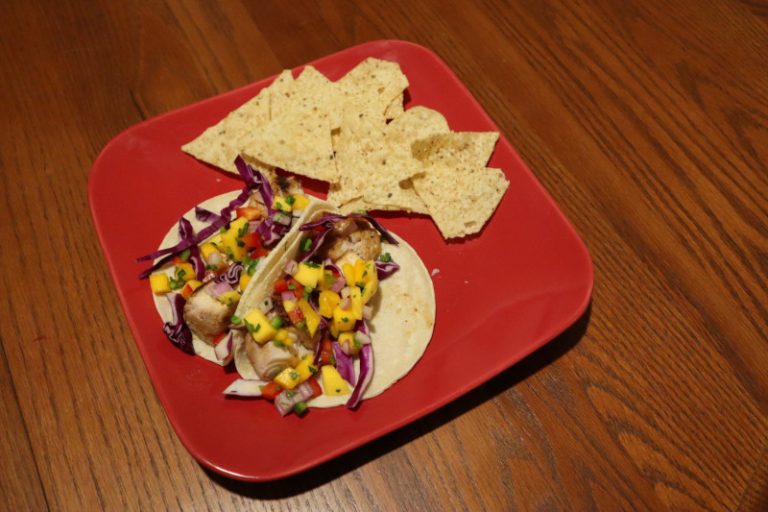
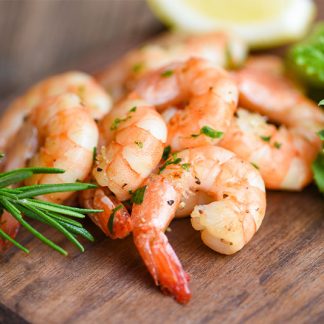
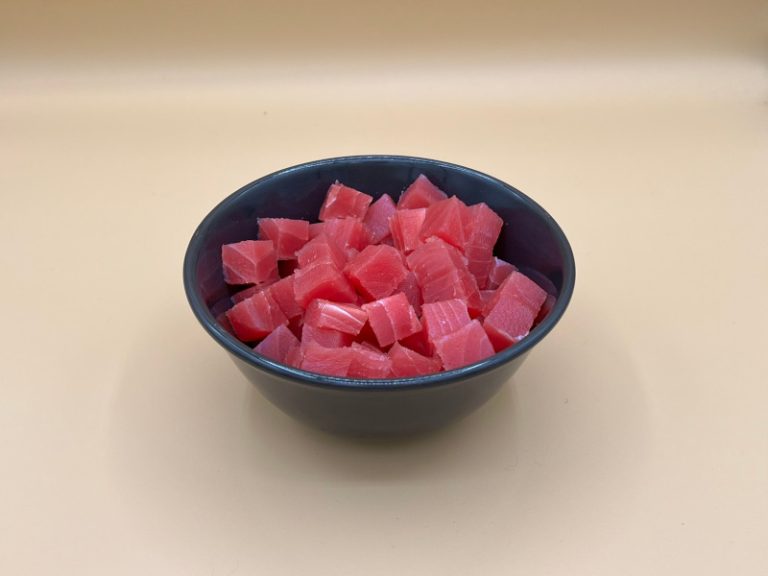
Posted on Leave a comment

Seafood Nachos

seafood nachos

Seafood Nachos

Football season is upon us, which means one thing: that you’re hosting a gameday party or two, and you need some easy, delicious seafood appetizers! 

Enter: Easy seafood nachos. Perfectly seasoned and succulent shrimp, scallops, and chorizo, layered over top of a bed of tortilla chips, and covered in melty cheese, fresh pico de gallo, and sour cream. It’s a quick, easy, crowd-pleasin’ and good eatin’ shareable to munch while your team destroys the other guys!

Side note: If you happen to be local, our pico of choice for this recipe is none other than the sweet heat Piña Pico, from the Pico Princess! Click here to check out her website and give her products a try!

seafood nachos

Share:

Seafood Nachos

Prep time

10

minutes
Cooking time

15-20 minutes

minutes

    Ingredients

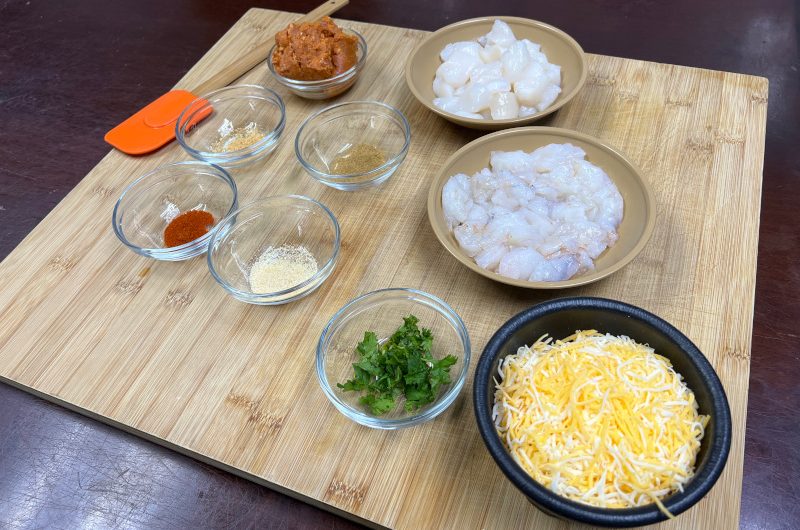
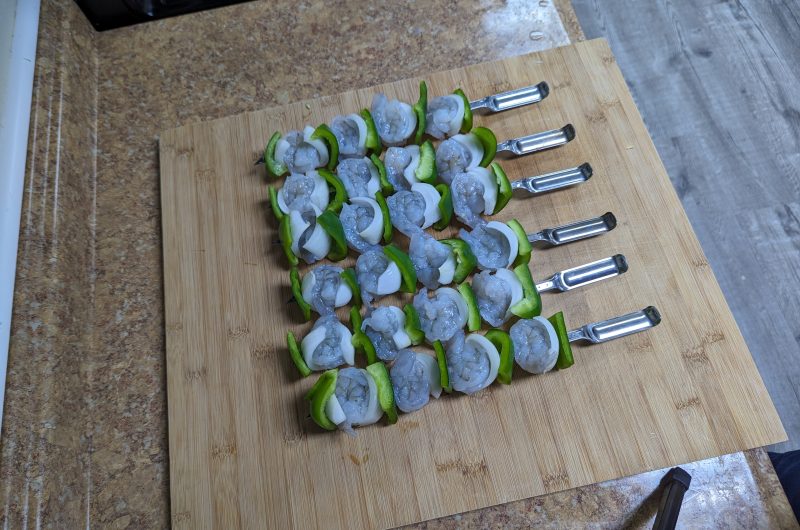
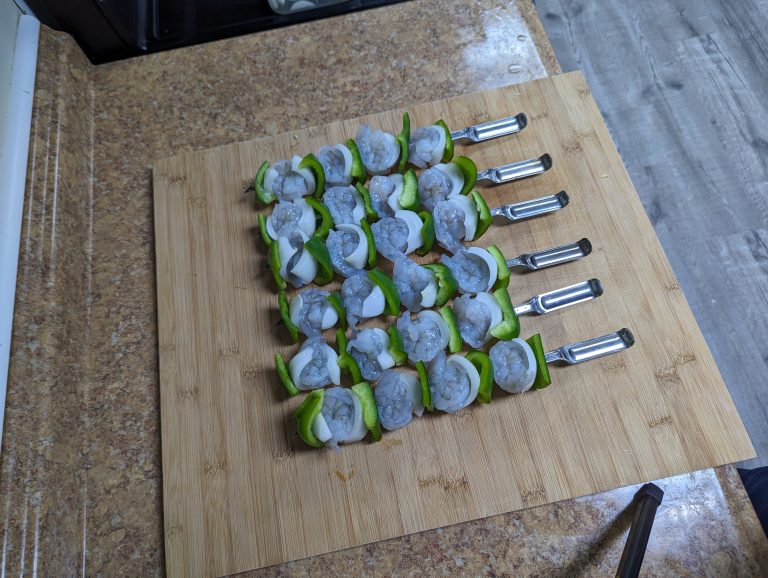
    • 1/2lb shrimp (peeled, deveined, chopped in halves or thirds)

    • 1/2lb scallops (cut into chunks)

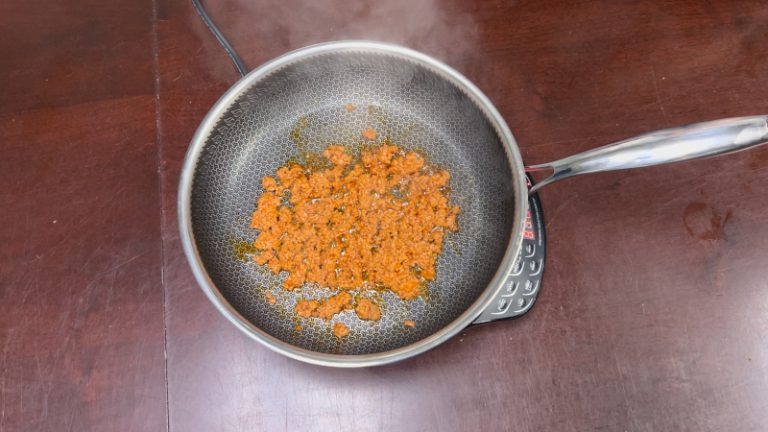
    • 2-3oz chorizo (optional but great for flavor and fat)

    • 1 tsp olive oil

    • 1.5 cups shredded cheese

    • 1/2 cup mango salsa or pico de gallo

    • 1 bag of tortilla chips (~11oz)

    • 1/2 tsp smoked paprika

    • 1/4 tsp garlic powder

    • 1/4 tsp onion powder

    • 1/8 tsp cumin

    • a pinch of cayenne or chili flakes

    • salt and pepper, to taste

    • zest of 1/2 lime

    • optional: sliced jalapenos, lime wedges, chopped cilantro

    Directions

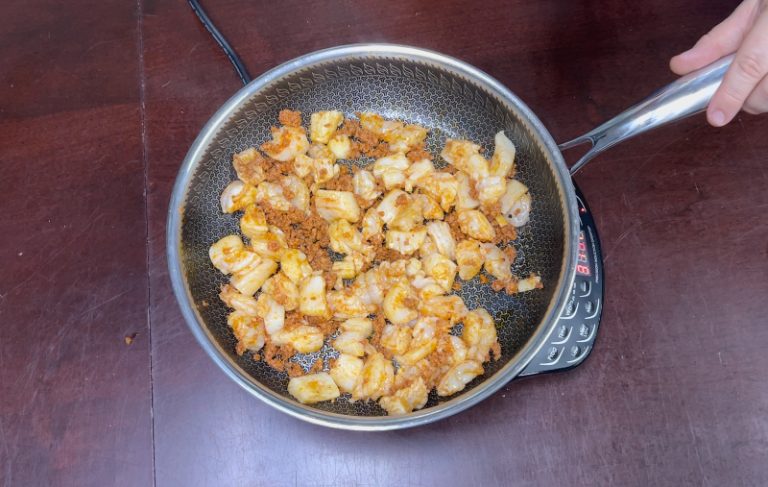
    • Saute the chorizo, shrimp, and scallops
      Preheat oven to 400°F for later. Mix paprika, garlic powder, onion powder, cumin, and cayenne together for your seasoning blend. Saute the chorizo until browned; remove and set aside. In the same pan, add oil if needed. Season and saute the shrimp and scallops with your seasoning blend just until cooked (about 3-4 mins)

    • Make your nacho set
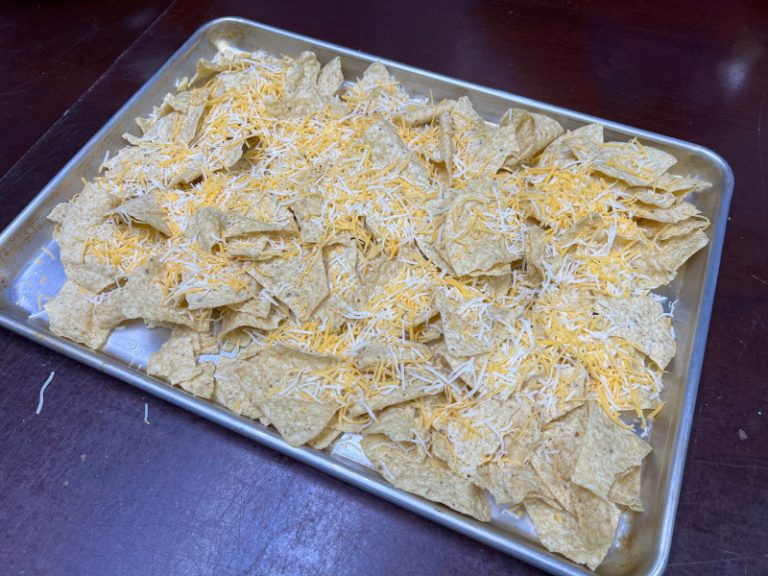
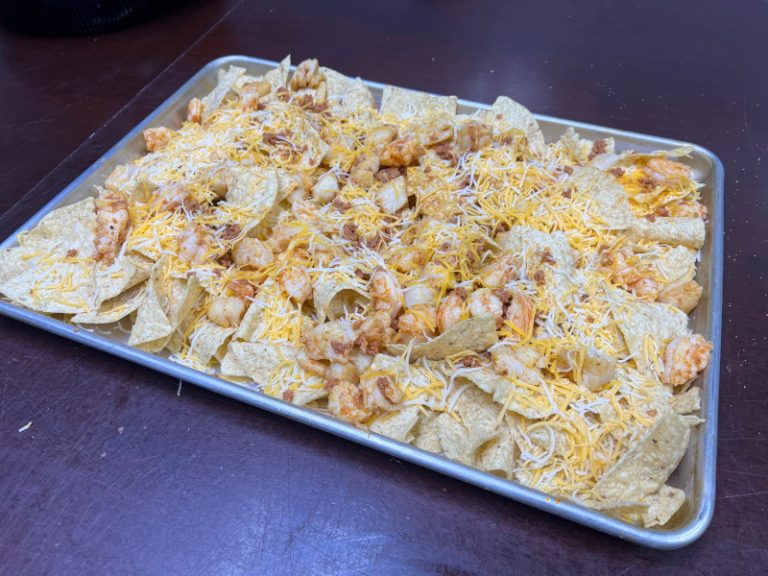
      On a sheet pan, layer chips evenly, and sprinkle with cheese as desired. Evenly spread your seafood mixture over the nachos and layer additional cheese if desired.

    • Bake and garnish
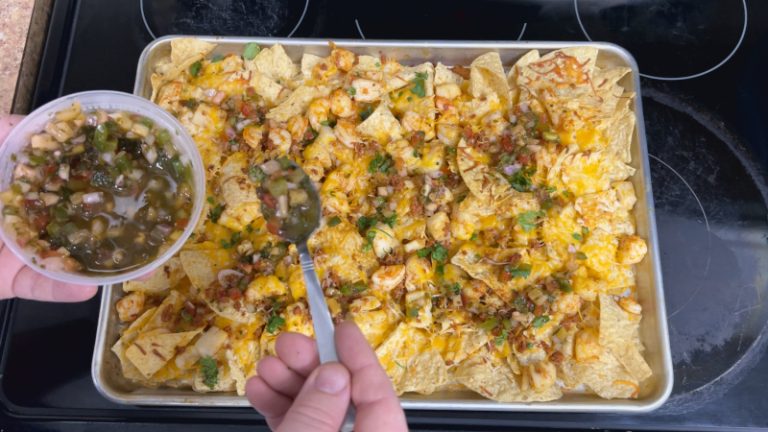
      Bake for 6-8 minutes, or until cheese is melted and bubbly. Remove from oven, and top off with fresh pico, cilantro, and sour cream, if you're so inclined!

      Leave a Reply

      Your email address will not be published. Required fields are marked *

      Posted on Leave a comment

      Smoked Salmon Crostini

      Smoked Salmon Crostini

      This smoked salmon crostini recipe is the perfect blend of effortless and upscale. Toasted baguette slices are topped with a bright lemon dill cream cheese spread, tender ribbons of smoked salmon, and a pop of salmon roe for that luxe, festive finish.

      Ready in under 20 minutes, it’s the kind of appetizer that makes you look like a holiday hosting pro without breaking a sweat. And if you don’t have salmon roe, capers make a great backup.

      Whether you’re entertaining a crowd or treating yourself to something special, this is the bite sized showstopper your table deserves.

      Share:

      Smoked Salmon Crostini

      Prep time

      20

      minutes
      Cooking time

      7-10 minutes

      minutes

        Ingredients

        • 1 small baguette sliced into ½-inch rounds

        • 4 oz cream cheese, softened

        • 4 oz smoked salmon, sliced into bite-size ribbons

        • Juice of a large lemon

        • Zest of a large lemon

        • 1 tablespoon fresh dill, finely chopped (plus more for garnish)

        • Olive oil, for brushing

        • Pepper to taste

        • 1oz salmon roe (ikura) for topping

        Directions

        • Toast the Bread
          Preheat oven to 375°F. Arrange sliced baguette rounds on a baking sheet, brush lightly with olive oil, sprinkle with pepper, and toast for 7–10 minutes, until golden and crisp.

          bread to toast for crostini
        • Make the Creamy Spread
          In a small bowl, mix the cream cheese with lemon juice, lemon zest, and chopped dill until smooth and flavorful.

        • Assemble the Crostini
          Spread a layer of the cream cheese mixture onto each toasted baguette slice.
          Top with a ribbon of smoked salmon, folded or curled to add height and texture.

          Garnish Like a Pro
          Add a small spoonful of salmon roe on top of each crostini.
          Don’t have salmon roe? Sub in capers and your appetizer will be almost as good 

          Finish with a sprig of dill or a few microgreens if you’ve got ’em.


          Serve & Enjoy
          Best served chilled or at room temperature. A fancy holiday snack in under 20 minutes!

          Leave a Reply

          Your email address will not be published. Required fields are marked *

          Posted on Leave a comment

          Citrus-Herb Grilled Wahoo

          citrus-herb grilled wahoo

          Citrus-Herb Grilled Wahoo

          citrus-herb grilled wahoo

          Florida summers and grilling fish… truly an iconic duo. This Citrus-Herb Grilled Wahoo is a refreshing and tasty recipe that embodies the Sunshine state’s quintessential season!

          Wahoo, much like swordfish, is an ideal candidate for grilling. It’s tough skin and steaky texture hold up quite well compared to more delicate alternatives.

          The citrus in this recipe adds a refreshing, tangy zest that, in our opinion, carries the wahoo over the finish line and to the podium. Consider some grilled vegetables or potatoes alongside it to complete a hearty meal! 

          Share:

          Citrus-Herb Grilled Wahoo

          Servings

          2

          servings
          Prep time

          15

          minutes
          Cooking time

          20

          minutes

            Ingredients

            • two 8oz fresh wahoo fillets

            • 2 tbsp olive oil

            • zest and juice of 1 lemon

            • zest and juice of 1 lime

            • 2 cloves of garlic, minced

            • 1 tsp fresh thyme (or 1/2 tsp dried thyme)

            • 1 tsp fresh parsley, chopped

            • 1/2 tsp smoked paprika

            • 1/4 tsp cayenne pepper (optional, for a touch of heat)

            • salt and black pepper, to taste

            Directions

            • Marinate the Wahoo: In a small bowl, mix olive oil, lemon zest and juice, lime zest and juice, garlic, thyme, parsley, smoked paprika, cayenne (if using), salt, and pepper. Place the wahoo fillets in a shallow dish or resealable bag, pour the marinade over them, and ensure they're well coated. Marinate in the refrigerator for 20-30 minutes (no longer to avoid overpowering the fish).

              wahoo_marinated_resize
            • Preheat the Grill: Preheat the grill to medium-high heat and oil the grates to prevent sticking.

            • Grill the Wahoo: Remove the fillets from the marinade, letting excess drip off. Place the fillets on the grill and cook for 3-4 minutes per side, depending on thickness, until the fish is opaque and flakes easily with a fork. Avoid overcooking to keep the wahoo tender and moist.

              grilling citrus herb wahoo
            • Serve: Plate the grilled wahoo and drizzle with a little fresh lemon juice. Garnish with extra parsley or lemon wedges if desired.

              Posted on Leave a comment

              Crab-Topped Chilean Seabass

              crab-topped chilean seabass plated

              Crab-Topped Chilean Seabass

              crab-topped chilean seabass plated

              Crab-topped Chilean Seabass – the name of the dish itself embodies luxury. The rich, buttery flavor of Chilean Seabass combined with a scrumptious crabmeat topping is, quite literally, a recipe for success. Regardless of the occasion, from a first Valentine’s Day spent together to your 15th anniversary, or even a graduation party or celebration, this dish is the way to dine in style.

              This recipe will leave you with some extra crabmeat topping, so make sure to have a backup plan! We made some crabcakes as an appetizer, but if you don’t cook it, you can save the remainder for another dish. If you’re already seeking to impress, some crab eggs benedict as breakfast in bed might be the cherry on top!

              Share:

              Crab-Topped Chilean Seabass

              Servings

              2

              servings
              Prep time

              15

              minutes
              Cooking time

              20

              minutes

                Ingredients

                • two 6oz pieces Chilean Seabass

                • 8 oz lump crab meat

                • 3oz bread crumbs

                • 1 egg

                • 8oz unsalted butter (room temperature)

                • salt and pepper, to taste

                • fresh lemon juice

                • a splash of worcestershire sauce

                • 1 clove garlic, minced

                • 1/4 cup onion, finely diced

                Directions

                • Preheat and prep: Preheat your oven to 375 degrees, and begin warming a medium skillet over medium heat with a small amount of butter.

                  ingredients1_resize
                • Prepare the topping: In mixing bowl, combine 4oz of butter, diced onion, minced garlic, salt, pepper, egg, and worcestershire sauce. Once well blended, gently fold in lump crab meat and breadcrumbs. Set aside.

                  seabass_topping1_cropped_resize
                • Preparing the seabass: Season the seabass fillets with salt, pepper, or an additional seasoning of your choice to make the dish uniquely yours! (David prefers a mustard for this recipe!) Sear both fillets for 2 minutes on each side, just enough to develop a golden crust.

                  seared_seabass1_cropped_resize
                • Bake and serve: Transfer the seared seabass fillets to a baking sheet. Top each fillet with the prepared crab mixture that was set aside earlier.

                  NOTE: This recipe will prepare roughly 2x the amount of crab topping that you will need. We pan-fried the remainder as a crab cake appetizer, but you can save them, uncooked with a paper towel for blotting, for a benedict the next morning, or whatever your heart desires, of course!

                  Bake in the preheated oven at 375 degrees for 15 minutes, or until the fish is fully cooked and the topping is golden brown. Remove from the oven and squeeze fresh lemon juice over each fillet. 

                  Serve immediately and enjoy a delicious, elegant meal. It's perfect for Valentine's Day or any special occasion!

                  Posted on

                  Peruvian Gold Shrimp Kebabs

                  A grilled shrimp kebob with vibrant green peppers, tender onions, and shrimp marinated in Peruvian Gold sauce, served on a decorative square plate with floral designs.

                  Peruvian Gold Shrimp Kebabs

                  A grilled shrimp kebob with vibrant green peppers, tender onions, and shrimp marinated in Peruvian Gold sauce, served on a decorative square plate with floral designs.

                  What is better than grilling outdoors? This recipe is quick and easy! If you do not have the Peruvian Gold you can substitute any marinade that you like for this recipe.

                  Share:

                  Peruvian Gold Shrimp Kebobs

                  Servings

                  4-6

                  servings
                  Prep time

                  15

                  minutes
                  Cooking time

                  8

                  minutes

                    This recipe could not be simpler, the biggest thing is to not let your shrimp marinate for too long because it can give the shrimp an unpleasant texture. So this time I made the kebobs in advance and did not put my marinade on until my guests arrived because again you really only want them to sit for up to 40 minutes with the marinade on.

                    Ingredients

                    • Peruvian Gold Marinade

                    • Skewers

                    • 2

                      Large Bell Peppers

                    • 1

                      Large Onion

                    • 1.25 lb

                      Shrimp Peeled and Deveined

                    Directions

                    • Prepare your shrimp: If your shrimp are peeled already then just pat them dry. If you need to peel them we have a video below to give you some pointers. 

                    • Chop Your Veggies: I like to cut them into roughly 1 inch squares but really any size will work. We just used onions and bell peppers but other fruit and veggies work great! A lot of people do tomato, pineapple, or even things like squash and zucchini!

                      A wooden cutting board on a kitchen countertop with two green bell peppers, a yellow onion, and six stainless steel skewers arranged neatly.
                    • Skewer and marinate them: Once your ingredients are all prepared it is time to skewer them and marinate them! Like I said I really like to make them ahead of time so that by the time my party starts I just have to fire up the grill!

                      A set of assembled shrimp kebobs on a wooden cutting board, each skewer alternating raw shrimp, green bell peppers, and onions.
                    • 4. Grill I like to grill these on Medium High heat for 3-4 minutes then flip them and go for another 3-4 minutes. It may take a minute longer if you marinated them and left them in the fridge. They smelled so delicious that we forgot to take a picture until after we had eaten most of them!

                      A grilled shrimp kebob with vibrant green peppers, tender onions, and shrimp marinated in Peruvian Gold sauce, served on a decorative square plate with floral designs.
                      Posted on Leave a comment

                      Bacon-Wrapped Smoked Salmon Jalapeno Poppers

                      bacon-wrapped jalapeno poppers

                      Bacon-Wrapped Smoked Salmon Jalapeno Poppers

                      bacon-wrapped jalapeno poppers

                      Looking for a spooky appetizer for the Halloween season? Look no further because these bacon-wrapped jalapeno poppers will be sure to bury your hunger in its final resting place.

                      Not only is this recipe great for parties, but it is gluten free and keto friendly! Our Verlasso salmon is a great option to smoke for this recipe; we’ll update this in the future as we add more smoked salmon products to our site!

                      Share:

                      Bacon-wrapped Jalapeno Popper Mummies

                      Servings

                      4-6

                      servings
                      Prep time

                      15

                      minutes
                      Cooking time

                      17-25

                      minutes

                        Ingredients

                        • 6 fresh Jalapenos, cut in half and seeded

                        • 4 oz cream cheese, softened

                        • ½ cup  shredded cheddar cheese

                        • 5 oz smoked salmon, roughly chopped

                        • ½ lb bacon, sliced thin 

                        • ¼ cup fresh chives, chopped

                        • 1 tsp garlic powder

                        • 1 tsp onion powder

                        • salt/pepper to taste

                        Directions

                        • Prepare the filling: With a clean, medium sized mixing bowl take the cream cheese, cheddar cheese, garlic powder, and onion powder mix thoroughly. Take the smoked salmon and chives and gently fold into cheese mixture. Once combined, set to the side.

                        • Stuff your poppers: Take your halved jalapeno, making sure to have removed all seeds, rinse and dry on paper towels. Once dry, begin to scoop cheese and salmon mixture into each half. (Make sure not to overload as the cheese will spill out when cooking)

                          mummy_unwrapped
                        • Wrap, bake, serve: Once stuffed, take a strip of bacon, wrap completely around jalapenos, and place on a baking sheet. Bake at 400 deg for about 17-20 minutes (longer for thicker cut bacon). Once out of the oven, sprinkle with salt and pepper, place sliced olives for the “eyes” , and enjoy!

                          bacon-wrapped jalapeno poppers
                          Posted on Leave a comment

                          Simple Tuna Poke Bowl

                          poke bowl

                          Simple Tuna Poke Bowl

                          poke bowl

                          The poke bowl – a culinary delight that’s as visually appealing as it is delicious. Poke bowls come in many colors, arrangements, and usually contain a beautiful swathe of ingredients. It is truly a canvas for the modern poke artist!

                          That being said, we’ve opted for ease, with this simple tuna poke bowl recipe! There are myriad ways to make one, and something like a soy sauce marinade for your tuna or fresh radishes could go a long way! 

                          For this recipe, all you need is to slice a few fresh vegetables, cook some rice, and thaw some tuna! This one is a slam dunk: preparation and effort is minimal, and the result is almost certain to impress and satisfy your fellow eaters!

                          Share:

                          Simple Tuna Poke Bowl

                          Servings

                          4

                          servings
                          Prep time

                          15

                          minutes
                          Cooking time

                          20-30

                          minutes

                            Ingredients

                            • 1 pound cubed poke tuna (thawed outside of package)

                            • 2 cups sushi rice

                            • rice vinegar and/or mirin rice wine, sparingly, to taste

                            • 1 cucumber, sliced

                            • 1 avocado, sliced

                            • 8oz seaweed salad

                            • 2 tbsp sesame seeds

                            • spicy mayo / sriracha sauce of your choosing

                            Directions

                            • Thaw the tuna: Frozen tuna is the safest option for raw consumption; make sure to thaw out of the package in your refrigerator for ~24 hours prior to making your bowls! It is very important to cut the tuna out of its package prior to thawing.

                              poke tuna
                            • Cook the rice: Using a rice cooker, ideally, set your rice to cook. White sushi rice is the best option for this dish, but make sure to adjust your water-to-rice ratio based on what type you have available.

                            • Prepare your toppings: Slice your cucumber and avocado to your preferred thickness and set aside. If you prefer making your own spicy mayo as we do, take this time to mix your sriracha sauce and mayo together. Toss tuna in sesame seeds to coat to desired texture.

                            • Portion and serve: Once your rice is done cooking, and still warm, add rice vinegar and/or mirin rice wine to taste (use sparingly, as it has a strong flavor). Portion your rice and tuna equally among 4 bowls, and layer toppings as desired. Garnish with sauce and extra sesame seeds if desired. Take a moment to eat with your eyes, and then dig in!

                              tuna poke bowl
                              Posted on Leave a comment

                              Crabmeat Stuffed Flounder

                              Crabmeat Stuffed Flounder

                              Search no further for a mouth-watering flounder dish, with this decadent Crabmeat Stuffed Flounder recipe! Our fresh and flaky flounder fillets are a perfect complement to the savory crabmeat stuffed inside. 

                              The best part about this recipe? Simplicity. The stuffing can be whipped up in minutes, saving you precious time during your evening!

                              We chose a classic southern Everglades seasoning for this recipe, but you’re free to season with salt and pepper for a more traditional taste, or some Slap Ya Mama seasoning for something a tad more cajun. Get creative!

                              Accentuated with steamed broccoli or mashed potatoes (or both, as we elected), a plate of this crabmeat stuffed flounder is easy on the eyes and tasty to the tongue! Order some of our delicious fresh flounder and try your hand at this recipe for your next family dinner.

                              Share:

                              Crabmeat Stuffed Flounder

                              Servings

                              4

                              servings
                              Prep time

                              15

                              minutes
                              Cooking time

                              15-20

                              minutes

                                Ingredients

                                • four 6 oz flounder fillets

                                • 8 oz crab meat (claw or lump)

                                • 1/4 cup mayonnaise 

                                • 1/2 cup bread crumbs

                                • 1 egg

                                • 2 tablespoons fresh parsley

                                • 3 tablespoons butter

                                • Everglades seasoning

                                • 1 lemon

                                • paprika, to garnish

                                Directions

                                • Preheat and prep: Preheat your oven to 375 degrees. Butter a baking dish,  and melt the remaining butter in a small bowl. Combine with juice of 1/2 lemon, and set aside for later.

                                • Prepare the stuffing: In mixing bowl, combine mayonnaise, egg, 1 tbsp parsley, remaining lemon juice, and 2 tsp Everglades seasoning (or your preferred seasoning). Add crab and breadcrumbs, and fold until sufficiently mixed.

                                  flounder stuffing_resize
                                • Stuff and wrap flounder: Lay flounder presentation-side down. Season with remaining Everglades seasoning (or your preferred seasoning). Spoon roughly 1-2 oz stuffing into center. Roll flounder, laying the overlapped section face-down to prevent it from unraveling, in your buttered baking dish. Using the lemon butter from earlier, brush each fillet liberally. Garnish with remaining parsley and paprika.

                                  flounder raw2_resize
                                • Bake and serve: Bake the flounder for 15-20 minutes, until fish is white and flaky. Plate with preferred sides and enjoy!

                                  flounder plate1_resize
                                  Posted on Leave a comment

                                  Sweet & Spicy Sambal Faroe Salmon

                                  sweet and spicy sambal faroe salmon on white plate with blue designs. served with seaweed salad

                                  Sweet & Spicy Sambal Faroe Salmon

                                  sweet and spicy sambal faroe salmon on white plate with blue designs. served with seaweed salad

                                  Add some zing to your next salmon supper with this sweet and spicy salmon! For this specific recipe, we recommend a premium salmon like our Faroe Island Salmon.

                                  The glaze for this dish is the signature flavor, using  honey or brown sugar for the sugar and sambal oelek for the spice. The result? Everything nice. Order a premium fresh cut of salmon from us today and try out this zesty sweet and spicy salmon!

                                  Share:

                                  Sweet & Spicy Sambal Faroe Salmon

                                  Servings

                                  4

                                  servings
                                  Prep time

                                  30

                                  minutes
                                  Cooking time

                                  10

                                  minutes

                                    Ingredients

                                    • 4 Faroe Island Salmon fillets (6 oz each)

                                    • 3 tbsp Sambal Oelek chili sauce

                                    • 2 tbsp soy sauce

                                    • 2 tbsp honey or brown sugar

                                    • 3 cloves garlic, minced

                                    • 1 tbsp fresh ginger, grated

                                    • 2 tbsp lime juice

                                    • 2 tbsp olive oil

                                    • salt & pepper, to taste

                                    • fresh herbs to garnish (cilantro or parsely, perhaps)

                                    • optional: 1 tbsp sesame seeds for garnish

                                    Directions

                                    • Prepare the glaze: In a bowl, combine 3 tablespoons Sambal Oelek, 2 tablespoons soy sauce, 2 tablespoons honey or brown sugar, 3 cloves minced garlic, 1 tablespoon grated ginger, and 2 tablespoons lime juice. Stir well until the ingredients are fully mixed.

                                    • Marinate the salmon: Lightly coat the salmon fillets with 2 tablespoons olive oil, and season with salt and pepper to taste. Brush each fillet with a generous amount of the glaze and let them marinate for 15-30 minutes.

                                    • Grill the salmon: Preheat your grill to medium-high heat. Place the salmon skin-side down on the grill and cook for about 4-5 minutes. Carefully flip the fillets over, brush more glaze on the top, and grill for another 3-4 minutes or until the salmon is cooked to your preference.

                                    • Garnish and Serve: Once the salmon is off the grill, apply the remaining glaze for an extra layer of flavor. Garnish with fresh herbs and, if desired, sprinkle with sesame seeds. The salmon can be served alongside steamed rice, a fresh green salad, or your choice of vegetables.

                                      Posted on Leave a comment

                                      Lemon Pepper Flounder with Mango Salsa and Stewed Green Beans

                                      lemon pepper flounder

                                      Lemon Pepper Flounder with Mango Salsa and Stewed Green Beans

                                      lemon pepper flounder

                                      Sweet and savory combine with a citrus kick in this lemon pepper flounder recipe that came straight from our staff! Stewed green beans and bacon provide a savory bed for zesty flounder, with a sweet & salty mango salsa to top it all off!

                                      Flounder is an excellent fish to pan fry, which you’ll see after ordering ours to give this delicious lemon pepper flounder recipe a whirl! 

                                      Share:

                                      Lemon Pepper Flounder with Mango Salsa and Stewed Green Beans

                                      Servings

                                      2-4

                                      servings
                                      Prep time

                                      45

                                      minutes
                                      Cooking time

                                      20-30

                                      minutes

                                        Ingredients

                                        • 1 flounder fillet, no skin & deboned

                                        • 1 Tbsp lemon pepper seasoning

                                        • 1/4lb clarified butter

                                        • 2 lb fresh green beans, clipped

                                        • ½ red onion sliced

                                        • 1 lb bacon cut in ½ in pieces

                                        • 1 cup chicken broth reduced by 80%

                                        • salt, pepper, garlic powder to taste

                                        • 2 ripe mangos small, diced

                                        • ½ med red onion small, diced

                                        • ½ red pepper small, diced

                                        • ½ orange pepper small, diced

                                        • 1 jalapeno small, diced

                                        • ½ bunch cilantro chopped

                                        • 1 teaspoon honey

                                        Directions

                                        • For the Mango Salsa: Mix mangos, half of the red onion, peppers, cilantro, and honey together at least 6 hours ahead of time.

                                        • For the stewed green beans: Crisp up the bacon and remove from the pot.  Add the onions, green beans, and seasoning and cook on med-high heat for 5 minutes.  Reduce heat to med-low and add reduced chicken broth.  Cover, stirring occasionally until desired doneness.

                                          lpf_1_resize
                                        • For the flounder: Pre-heat a cast iron skillet to med-high.  Place the seasoned flounder in the hot pan and immediately place under the broiler on high for 7-10 minutes until done

                                          lemon pepper flounder
                                          Posted on Leave a comment

                                          Mango Salsa Mahi-Mahi Fish Tacos

                                          mahi fish tacos

                                          Mango Salsa Mahi-Mahi Fish Tacos

                                          mahi fish tacos

                                          Take a trip down sweet and savory lane with our Mango Salsa Mahi-Mahi Fish Tacos! They’re quick, easy, and a crowd-pleaser! Order some of our delicious fresh Mahi-mahi today and try your own at home!

                                          These mahi fish tacos are the full package: savory, crispy, pan-fried mahi, topped with crunchy cabbage and a sweet and salty mango salsa. They’re sure to be a crowd pleaser!

                                          Share:

                                          Mango Salsa Mahi Mahi Tacos

                                          Servings

                                          4

                                          servings
                                          Prep time

                                          45

                                          minutes
                                          Cooking time

                                          30

                                          minutes

                                            Ingredients

                                            • 2lbs mahi-mahi, cut into 2-4oz pieces

                                            • 8 tortillas of your choice (white corn or flour is our preference)

                                            • 1 head red cabbage, chopped

                                            • 2 tsp garlic powder

                                            • 2 tsp onion powder

                                            • 2 tsp paprika

                                            • 1 tablespoon chili powder

                                            • 3 mangos, diced

                                            • 1 small red onion, chopped

                                            • 1 jalapeno, deseeded and minced

                                            • 1 bell pepper, diced

                                            • 1/4 cup chopped cilantro

                                            • salt for salsa, to taste

                                            • 1/2 tbsp butter

                                            • 1/2 tbsp olive oil

                                            Directions

                                            • Prepare the mango salsa: Combine diced mango, peppers, red onion, and cilantro in mixing bowl. Salt to taste and allow to settle while cooking mahi.

                                              mahi fish tacos ingredients
                                            • Chop the cabbage: Cut the head of cabbage into quarters, carefully removing the stem afterwards. Chop each quarter into thin shreds for your tacos.

                                            • Preparing the mahi: Combine garlic powder, onion powder, paprika, and chili powder together. Apply liberally to your chunks of mahi mahi. In a large skillet, melt your butter and olive oil on medium heat. Fry until the bottom develops a golden brown crisp. Flip, and allow to cook until fish is opaque and crisped on both sides, about 3-4 more minutes.

                                            • Serve it up: Warm your tortillas, and load up your tacos with fresh mahi and mango salsa! Enjoy!

                                              mahi fish tacos